Enhancing Stars in Photoshop
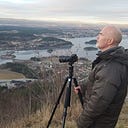
For the sake of example lets say I would like to enhance the stars in the image below. I could then for instance load the image into Camera Raw and add some Clarity at the risk of adding noise and artifacts to the night sky. Another way of doing it could be to use “Select Color Range” combined with for instance a curves or levels. However, I now and then find that this method doesn’t yield a satisfactory result. I am not saying that the technique I am to demonstrate is the best, just that it is my preferred approach to achieve what I have in mind.

A sky or a night sky is rarely uniform in terms of luminosity. There will be both color and luminance gradients across the sky. I will thus add several blank layers set to Normal which cover various parts of the sky. In this example I start in the upper right corner painting with white at 100% opacity.

Next I double click on the layer which brings up the Layer Style dialog box. I am only interested in the bottom left slider where it says “Underlying layer”. Moving it to the right equals protecting the dark tones from the layers below the current layer.
I am happy with the adjustment when the white I painted in is affecting the stars only. I often prefer to feather the ‘selection’ by pressing down Alt/Opt which splits the slider in two when placing the cursor on the right part or to the right of the double arrow.

I add a new blank layer set to Normal and paint white in the bottom right corner of the sky and then follow the steps outlined above.

In this instance I encounter an expected issue due to the gradients in the sky. When the stars are shining even brighter than before some white residues are left below the milky way core. I simply grab the Eraser tool and remove it.

The left part of the sky may have approximately the same luminosity values as the right part so I try to use the layers I have already added and paint with white using the Eraser tool to remove any unwanted effect. If this doesn’t work I add new blank layers for that side of the sky.
Always when I am done with a star enhancing layer I turn that layer off and on several times to check if I unwittingly have brightened parts of the sky. If that is the case I again double click on the layer to further fine tune the Blend-If sliders, or I use the Eraser tool if I painted too far across a gradient. Reduce the opacity of the layers if the stars come across as too bright.
The finished image: